Do you have a green thumb? Even if you don’t, propagating succulents is very easy to do and extremely satisfying. Plus, it’s a great way to get more plants without having to spend any more money. All you need is a healthy mother plant and some patience. Here’s a step-by-step guide on how to propagate succulents in water:
Step One: Choose a Healthy Succulent
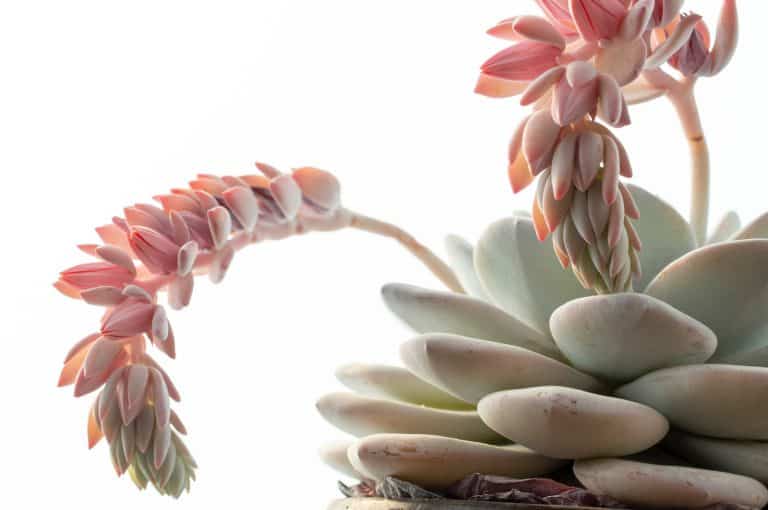
The first step is to choose a healthy succulent plant that you would like to propagate. The best time to do this is in the season when the plant is actively growing. Some succulent plants are summer growers whilst others are winter growers. Avoid picking a plant that looks sickly or has yellowed leaves, as this will decrease the chances of success. Choose a plant that has firm leaves, as dry withered leaves are unlikely to propagate either.
When choosing a stem or leaf, you may wish to think about how the original plant will look once you have removed the part you will be propagating. Is the main plant going to be on display? Do you want it to still look full and symmetrical? This will help your decision when choosing where on the plant to take your leaf or stem cutting from.
Step Two: Remove the Leaf or Stem
Once you have selected a healthy leaf or stem, you need to remove it from the main plant. How you do this will depend on whether you have chosen to remove leaves or to take stem cuttings.
Taking stem cuttings
Use a sharp knife or scissors to cut it from the main plant. Ensure that the knife or scissors are clean so you do not transfer any bacteria or diseases from anything your cutting tool may have previously touched. You can use isopropyl alcohol to clean your knife or scissors which can be found at the hardware store.
Make sure to make the cut clean and straight. If possible, try to avoid cutting off any of the existing roots, if there are any attached.
Stem cuttings can also be removed by gently pulling them away from the main plant. If the stem is particularly woody, it may be necessary to use a sharp knife or scissors to make the initial cut before gently removing the cutting from the plant.
Leaf Cuttings
When removing a single leaf from your succulent plant, it is important to make sure that you do not damage the leaf when removing it, as this could affect its ability to root successfully. The easiest way to remove the succulent leaf is to twist it gently until it comes away from the stem. If you gently wiggle the leaf from side to side, it will usually pull away from the stem cleanly. If the leaf feels like it is going to tear, then stop and try another leaf. It is also possible to use a sharp knife or scissors to make a clean cut close to the base of the leaf.
The end of the leaf needs to have a clean, smooth edge as this is where the new baby plant and roots will form. Occasionally, succulent leaves will still grow successfully from a broken leaf, but it is much less likely.
Step Three: Remove the Lower Leaves (if necessary)
If you are working with a stem, you will need to remove the lower leaves. This is because we want the stem to be able to grow roots, and it can’t do that if the leaves are in the way. The lower leaves can be removed in the same way as described above (Stem cuttings). Don’t throw them away! Each one could potentially grow into a new plant.
The point where the leaf was attached to the stem is called a node. This is where new roots start to grow from.
Step Four: Allow the Cutting or Leaf to Callous Over
The next step is to allow your cutting or leaf to callous over. This simply means allowing the wound where you removed the cutting or leaf from the main plant, time to heal over and form a protective barrier.
To do this, simply place your cutting or leaf on a dry surface in a well-ventilated area and allow it to sit for 24-48 hours. Once the wound has healed over and formed a callous, it will be ready for the next step.
If you are in a hurry, you can place your cutting or leaf into a container of water immediately after removing it from the main plant. However, this isn’t recommended as it increases the chance of your cutting or leaf rotting.
Step Five: Place the Cutting or Leaf into a Container of Water
Now it’s time to place your cutting or leaf into a container of water. This is where the fun begins!
The type of container you use doesn’t really matter, but it is important that the container has a wide opening at the top so that the new baby plant can grow and breathe easily. You can use any type of container such as a glass jar or vase. Just make sure that there is enough room for your succulent to spread its roots out. I often use a large family size plastic yoghurt container (cleaned out of course!).
The water should be room temperature (not cold) and not too deep – about half an inch (or less) is perfect. Too much water can cause the roots to rot, so it’s important to make sure that the container doesn’t hold too much.
You may wish to use distilled water or rain water in your container. I have had success simply using tap water.
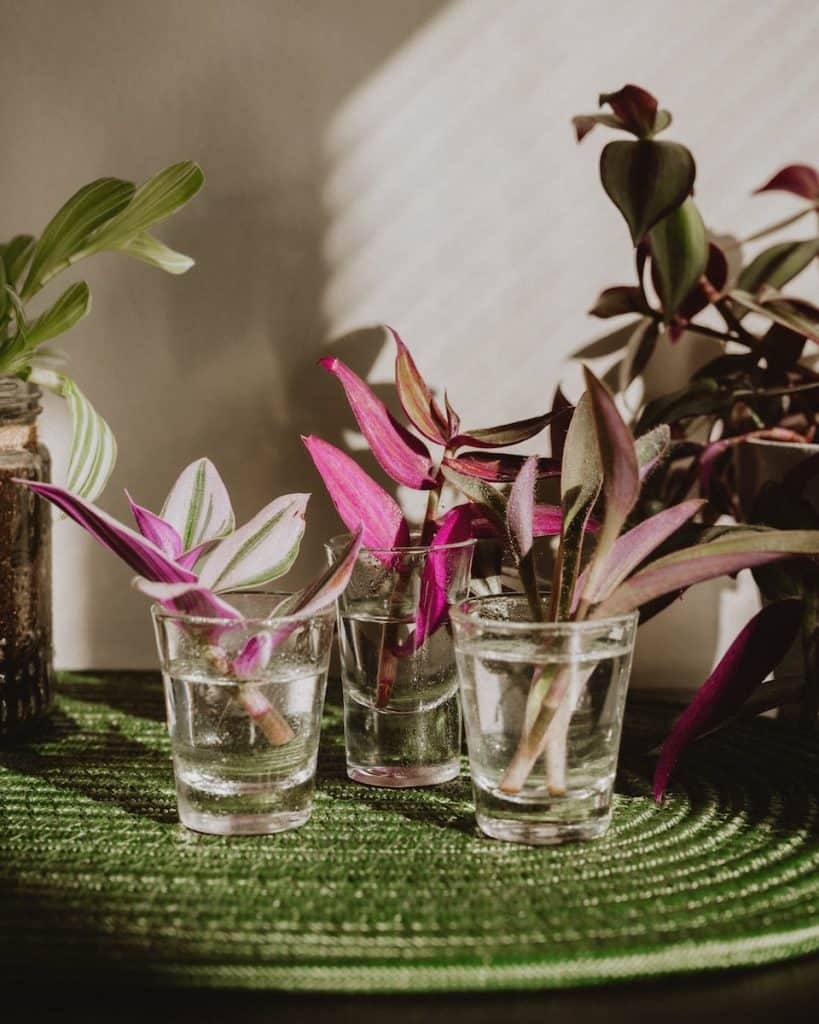
Now it’s time to place your stem in the water. Make sure that only the bottom part of the plant is submerged in water. The upper part should be out of the water so that it can continue to photosynthesize.
Alternative water propagation method: Suspend your cutting or leaves above the water
Another way of propagating succulents using a water propagation method, is to support your succulent cutting above the water, but do not let it actually touch the water.
To do this, you will need to find a way of supporting your cutting above the water. This could be done by placing it on a piece of wire or string which is then suspended over the water.
You could also use plastic wrap stretched across the top of a container and then poke holes in the plastic wrap to push your succulent cuttings or leaves through.
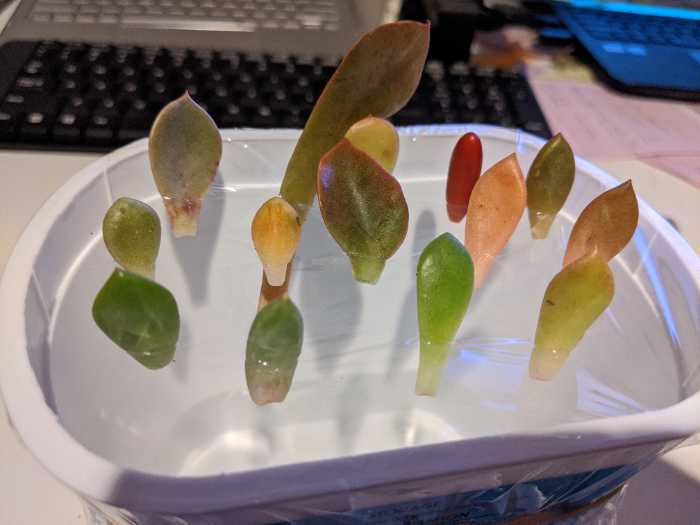
Alternatively, you could place it on top of some rocks or stones which are sitting in the water.
The idea is that the succulent stem or leaf will begin to grow roots down towards and then into the water below, without the succulent cuttings actually being submerged in the water.
This method can work well for those who are worried about their succulents rotting if they are placed in too much water. I find this method in particular is better when propagating succulents leaves.
Once you have placed your cutting or leaf into the container of water (or supported it above the water), put it in a bright spot, but not in direct sunlight. This indirect light is sufficient for your cuttings to start to grow, without being too harsh on the immature roots as they form.
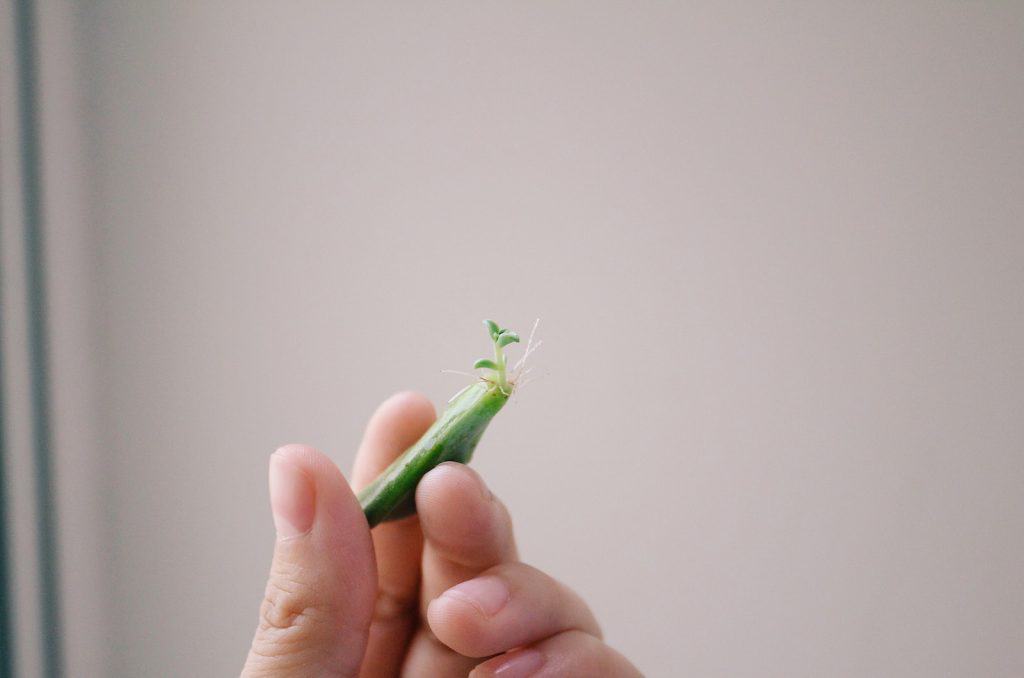
Step Six: Be patient!
The final step is to wait patiently! It can take anywhere from a few days to a few weeks for your succulent cutting or leaf to grow roots and start growing into a new plant.
You will know that the roots are starting to form when you see little white/pink nodes appearing along the stem or at the base of the leaves.
Once you see these nodes, you will soon start to see the roots and babies growing. It means that your succulent is successfully propagating in water!
Remember to keep an eye on the water level in your container and top it up as needed. I like to change the water every week or so, just to make sure that it stays fresh. Too much stagnant water can lead to root rot, so it’s important to keep things fresh!
How to Propagate Succulents in Water: The final word
And that’s it! You’ve now successfully propagated your succulent in water and you can sit back and watch it grow! Over time, you will need to transplant your new succulent plant into a pot with fresh potting mix, but I’ll talk about that in another post.
I hope you enjoyed this blog post on How to Propagate Succulents in Water. This was how I first started propagating and it started off my love of succulent plants.
You might also like to try other succulent propagation methods such as Air Propagation, Propagating from Offsets or Propagating from Seed.
Happy propagating!